Get Kids Started With Arduino
Arduino is Perfect for Kids
Once kids are old enough to enter the world of electronics, even if it's with your help and supervision, Arduino is a perfect choice.
Arduino is really simple to use, it is simple to code, and it is relatively cheap to get started with. Here is our guide for parents to help get your kids started with Arduino, and a little info to help you understand Arduino. Once you gain a little knowledge, you can take a look at our list of Arduino projects designed for kids.
Related: Kids & Adults Arduino Tees
What is Arduino?
We recently wrote an entire post where we attempt to simply explain what Arduino is, which will give you a better understanding. But here is a very simple overview:
Arduino is a company in Italy. The company produces 2 core products; Hardware and Software. The hardware is easily programmable by using the software. Which allows people to build real-world projects with them.

How Arduino Works
Once again, we have written a detailed post where we simply explain how Arduino works which will give you great insight. But for now, here is a brief explanation:
Basically, you write a program in a specific code on your computer and upload it to your Arduino board. Your Arduino board will now run this code every time you power it up.
Your Arduino board is usually connected to inputs and outputs. EG, a button is in input and a led is an output. Your code will be reading all of the inputs and controlling all of the outputs.
For example, An Arduino board might be connected to a light sensor and an led. Your program might say, "When the room gets dark, turn on the LED." Obviously it will be coded more specifically than that, but that's the thought process behind it.
What Kids Need to Begin with Arduino
Your kids won't need much to start programming and making awesome stuff with Arduino. For example, they can get started with just a single Arduino board, and a single LED. However, to make things a bit more fun and interesting and given their low cost, we have made a list of the things you might want for your kids starting out in Arduino.
Please Note: Because Arduino is open source, there are a lot of companies that make the products, don't worry about the brands too much. EG: We use iDuino as a brand. It's all very similar, especially when starting out.
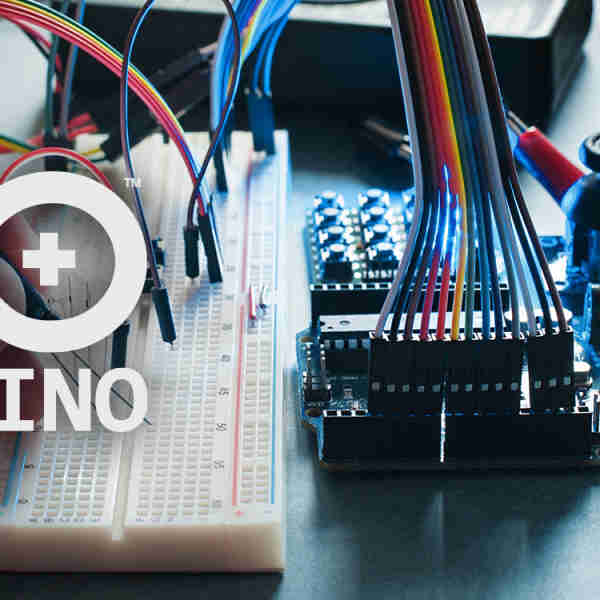
Arduino Main Board
There are 3 main Arduino boards which are mostly different in size. But for kids starting out, just stuck with the Arduino Uno. It's low cost and generous size will allow them to make a vast amount of projects.
Wiring & Accessories
A Breadboard is a must-have item, it is used for 'prototyping'. It allows you to create projects without the need to solder them in place. You just use cables with push pins at the ends (Jumper wires) and push them into the board.
Jumper Wires as mentioned above are used to connect the Arduino to the breadboard and sensors. They come in 3 types: Plug to Plug (Male at each end), Plug to Socket (Male at one end and female at the other) and Socket to Socket (Female at both ends). Just get yourself some of each, and different lengths. They are very cheap. You can also get solid jumper wires which are not flexible and are really good for keeping projects tidy.

Laptop or Computer
Kids will need access to a PC or Laptop of some description. You can use Mac or Windows. When your kids are writing the code, they will use the PC and it will connect to the Arduino via a USB cable. You won't need anything powerful, as programming is done via a web browser. If you are looking at Arduino and programming long term, you might want to build the kids a cheap dedicated PC for their workbench.
Tools for Arduino
You can create some small kids Arduino projects without tools just by using the breadboard and jumper wires, however, when your kids want to get a bit more creative, you may want to get a few tools together:
A Soldering Iron is not too expensive, and obviously kids must be supervised when using it. But it is a very handy tool when you are creating kids electronics projects off the breadboard. You could also get yourself a small soldering stand that has clips to hold your Arduino while soldering it.
Cutters & Pliers are very handy too. You also need these when moving off the breadboard into actually making the projects. You won't need large tools, just small cutters and pliers.
A Hot Glue Gun is an awesome tool to own when creating kids Arduino projects. It allows you to glue together all of your parts and when you have finished with your project, you can remove the glue and reclaim all the parts. Hot glue doesn't conduct electricity either, so you can mount your board to things using glue. Cardboard is a material used often in kids projects and hot glue is the fastest and best way to glue it together. As with the soldering iron, parental supervision is advised for younger kids when using the hot glue gun.

Arduino Components: Inputs & Outputs
An Arduino board by itself is not very useful and doesn't make for fun kids projects. What you need to do is connect inputs and outputs to the Arduino mainboard.
Inputs and outputs are quite easy to understand if you think about them logically. Here is a simple and brief explanation of inputs and outputs:
Arduino Inputs: An input is something that sends information to the Arduino mainboard. Usually called sensors. A few input components that come to mind for kids projects would be things like: Temperature Sensor, Buttons, Light Sensor, Heart Rate Sensor and Soil Moisture Sensor. These all detect something and send their signals to the Arduino main board when requested in the code.

Arduino Outputs: Outputs are components that receive information from the Arduino mainboard. They are usually the result or desired activity. Here are a few output components that are commonly used by kids getting started in Arduino: Buzzers, LED Lights, Motors, Servo Motors and Solenoids. These items all do something when commanded to by the Arduino Board.

Resources & Junk
When kids start building real projects with Arduino, they are going to need the stuff to build with. Most kids projects are built with recycled materials like cardboard and plastic. We suggest you get yourself a couple of large storage boxes and start collecting things to make projects with. We recently wrote an article about how we collect resources for STEM activities and it applies to Arduino.
Start Kids Understanding Arduino Concepts
Before you get out the tools and before your kids start coding away at their first Arduino project, take a moment to plan your project and understand how Arduino works.
Teach your kids the relationship between inputs and outputs, and then come up with a plan of your first Arduino project.
When we start planning a project, we just talk through each step of the project and act as if we are the Arduino board sending and receiving instructions. We line up each component and then run through the concept of the project. Then, once we do this, all that is left is for us to convert what we just acted out and spoke about into code. You may run into a few small issues after coding it, but you will find that if you start with a plan before you code, it will be a lot easier.
Here is an example: We want to create a night light. In front of me, I have a light sensor and a LED light. I want the light sensor to check the ambient light of the room every 1 minute. If the light is lower than 'X' (Whatever value I think is dark), then turn on the light. If the light sensor reports the room is higher than or equal to 'X', then turn the light on.
When your kids grasp the concept of inputs and outputs, they are ready to head down the awesome road of Arduino and programming. They will be able to come up with plenty of projects when they understand the basics. Kids will be able to look at a sensor and come up with a plan with it. EG: Water a plant when it is dry.
Coding For Kids Arduino Projects
The coding of your concept will probably be the hardest part of your project, but also one of the most educational. We can't go into a lot of detail here about how to code, but you are going to find tons of help on the Arduino site that will convert your concept into code.
Here is some sample Arduino code:
// the setup function runs once when you press reset or power the board
void setup() {
  // initialize digital pin LED_BUILTIN as an output.
  pinMode(LED_BUILTIN, OUTPUT);
}
// the loop function runs over and over again forever
void loop() {
  digitalWrite(LED_BUILTIN, HIGH);   // turn the LED on (HIGH is the voltage level)
  delay(1000);                       // wait for a second
  digitalWrite(LED_BUILTIN, LOW);    // turn the LED off by making the voltage LOW
  delay(1000);                       // wait for a second
}
The code here is broken up into two sections. Setup and Loop.
Setup
The setup section of the code is just run once when the Arduino board is first turned on or reset.
Loop
The loop is just that. Once the setup is complete, the loop runs over and over and over. It keeps on running while the board continues to remain powered.
Getting Started on Real Projects
Once you have all your tools, components and resources, your kids are ready to start their Arduino projects. From the information above, you should be able to come up with a project using the sensors and components you have in front of you. Start basic, don't get too carried away early. If you are using a breadboard, you can make a lot of different projects in one day. It is great practise. EG: Turning LED's on and off using all different sensors.
Once you have played around for a while and created a few basic projects, you might want to create something a little more advanced and more permanent.
Here are our latest projects: Arduino Traffic Lights for Kids Cars
Also, here is a great list of kids projects on the Arduino create site: Kids Arduino Projects.
Why Kids Should Start Learning Arduino
I am not an expert in kids development, so I am going to approach this and declare this as an opinion piece.
Arduino and computer programming is not really a hard concept to understand, and it really helps kids develop many skills. In my opinion, logic thinking and problem-solving are the biggest skills kids will learn with Arduino. As an adult, I have been programming in many computer languages for over 15 years, and I believe the logical thinking and problem-solving skills have helped me in many facets of my life, from finance to relationships. I have a lot to thank computers and programming for.
Another important reason for kids to start programming Arduino is that in my opinion, it is the future. Programmers and logical thinkers will be required in almost every industry in the world. They almost are now, and this is definitely the direction for the future. Amongst other things, setting my kids up to be an in-demand person in the future will ensure they are successful.
Links & Resources To Start Arduino
Here is a list of resources to help your kids start programming Arduino. We use these resources ourselves, and they are sure to help you and your child.
Arduino Website
The home page for Arduino, and quick links to projects and products.
Arduino Create
Arduino Create is the online coding platform where you can write your code and save your projects. Basically your home page for your Arduino projects.
Arduino Project Hub
Arduino Project Hub is where the Arduino community posts their projects, and is a great place to gather inspiration when your kids are ready to start their Arduino adventure.
Arduino Getting Started
A great documentation resource for anyone getting started with Arduino.
Aus Electronics
For Australian Consumers, this is a great electronics store online. We buy a lot of products from this store. Please note, this is NOT a paid endorsement. We did not receive anything from them. We just really like their price, products and service.
Putting Kids Safety First
Safety should always be your first priority. Ensure you do not allow kids to attempt anything dangerous. Ensure you are supervising your kids very closely and assist them when using tools like the hot glue gun and soldering iron.
Read Next

Arduino Projects For Kids
Here is an excellent list of Arduino projects for kids. These Arduino kids projects are not only fun but teach kids invaluable life lessons.